My Way, No. 30

*If you’re new to my blog, you may want to read this for info on what ‘My Way’ posts are all about. 🙂 *

— After all that talk about bread this past week, I thought I would link you to an inexpensive DIY banneton: $2 Banneton for Better Bread Loaves | instructables.com.
image
Natural Dyes – All Natural Ways To Dye Fabric | diynatural.com.
image

Adventures in Food: Ever since I posted the English muffins recipe, I have been thinking about making Benedict. I finally made it, but I decided to go with the Italian Scones recipe (posted here) as a base.
image
For the scones, I used my sprouted whole wheat pastry flour, subbed homemade non-fat Greek-style yogurt for butter, and dried the leftover marinated tomatoes from the Smothered Mediterranean Chicken. Roasted sweet mini peppers and tomato hollandaise. Cocktail from a berry-pom shrub and fizzy water. I used the arils for a garnish like the Tangerine-Pom cocktail posted here.
image
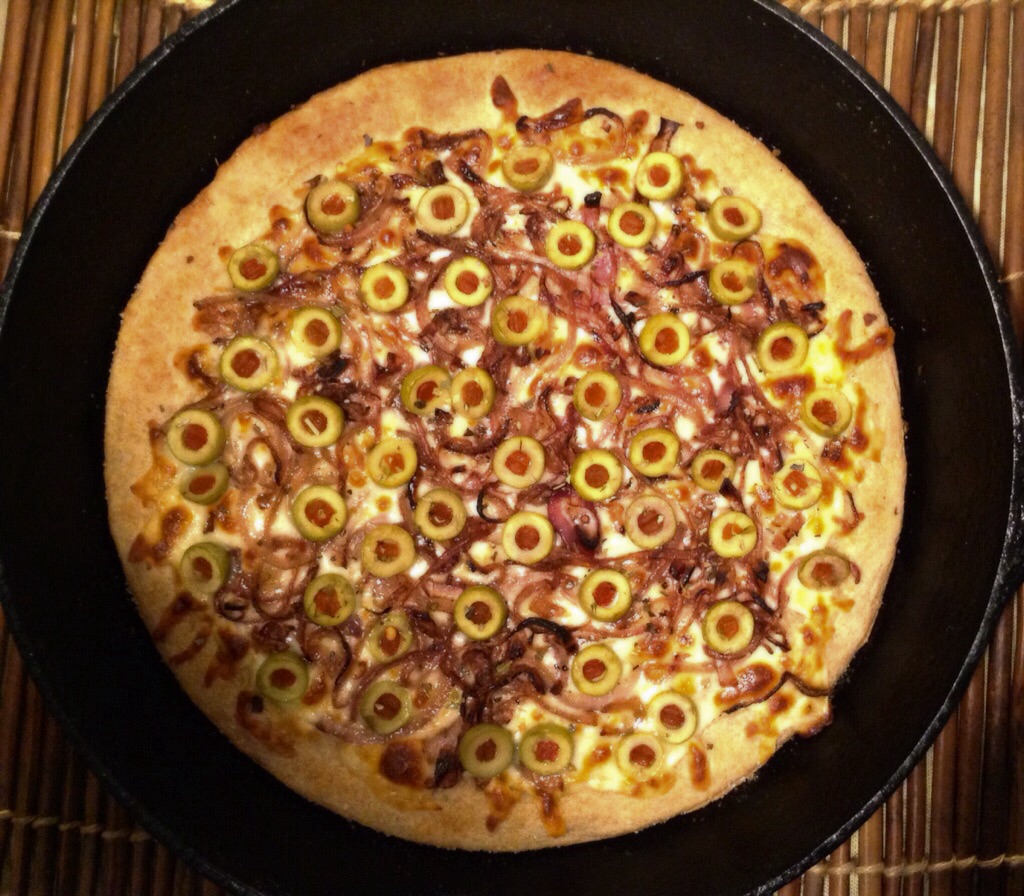
This was just supposed to be a small snack of ciabatta & olive oil, grapes, and a little vino. I decided to go for a bit more to make it a full meal. A little melted cheese (vs. oil) & red wine-thyme onion jam for the bread, some nuts, olives, Honey-Balsamic Turkish-Spiced Chickpeas, beet-pickled egg, and giardiniera. The egg and giardiniera were quickles, as I hadn’t really planned on having them. I subbed skim milk with just a little bit of olive oil for the whole-y (holy?) ciabatta. It was fab!
The Seafood Lasagna recipe I posted turned into 2 dishes:
imageimage
Filling was salmon, crab, arugula (I had some to use up), homemade non-fat ricotta, homemade non-fat Greek-style yogurt, parm, garlic, onion, s&p. I also added a little beaten egg to the lasagna roll filling. Just a little bit of parm and the creaminess of the yogurt added a richness to the ricotta. The rolls are great for the freezer to pop out for a quick meal. I made the ravioli with my milled hard red wheat berries, vital wheat gluten, egg, egg yolk, and water. White sauce with skim milk, olive oil roux, white wine, parm, and roasted garlic. Finished with pistachios. I whipped up some fresh butter in the food processor (my indulgence) for the bread. It takes 5-10 minutes or so, depending on your processor. I was inspired by the Rosemary Lemonade here for the strawberry-basil lemonade. Sweetened with the Berhi date syrup and stevia.

I had some toasted quinoa & kept craving carrots, so I made this Grilled Carrot & Walnut Salad with Carrot Top Pesto (a few times, once with rice) — yums!:
image
For a special occasion, I told you that I made the ciabatta, but I also finally made this Turkish-Inspired Pistachio & Cardamom Cake with Pomegranate Cream Filling (posted way back when):
image

But
…it’s a mini version. This was actually only a 1/5 of the recipe, and guess what it was baked in? A parchment-lined soup tin! I made this a couple of weeks ago, sliced it, wrapped it well, and stuck it in the freezer. So, all that was left was the icing. I love these rustic cakes, let me tell ya. During the pastry portion of culinary school (way, way back in the day), cake decorating, pulling sugar, etc., was clearly not my thing. I stuck to cakes from a box, lol. I got up the nerve to try this cake, though, and I’m so glad I did! I sliced a piece from the top before freezing, and it was so moist. I made substitutions of homemade non-fat Greek-style yogurt for butter, and a mixture of coconut sugar and the Berhi date syrup for demerara. As I can’t have too much cream or butter, I went with a snow peak frosting: whipped egg whites, Mexican vanilla, honey, and stevia. This was lovely, and it made me confront my cake fears, haha! This is a wheat-free cake, so please check it out if you have an intolerance.

— As there was a weather prediction of possible 50’s-60’s temps  (early morning) this week, I went ahead and made my ruana. The weather was back to the 90’s before you knew it, though. So super simple, so I am probably going to make another one.The ruana featured in that post has several different styles, including a belted option. I wore mine with a brooch, but here’s a DIY belt & brooch combo (if the color is too summery for you, you could easily go with your current fall fave): Easy summer DIY fashion projects – A chic braided and wide corset belt | diy-enthusiasts.com.
image

Another use for stencils! Stenciled Tote Bag | Nomadic Decorator.
image

— At one point (before I decided on a decor overhaul), I had a Frida Kahlo picture in my work office. I always feel drawn to her work for some reason. There’s just something in it that grabs hold of me. I spotted this wonderful piece on her, so I thought I would share it: Style Icon – Frida Kahlo | Design Sponge.
image

Now I have another wine cork project to work on: DIY Garden Decoration Ideas | Interior Design Ideas.
image

10 rules of Etiquette Everyone Should Know (and Follow!) | wisebread.com.

Tasty Treats:
Confessions of a Cardamom Addict: Guinness onion soup with bleu cheese croutons.
image
Oh! I got such a craving when I saw this: Mongolian Beef Recipe | userealbutter.com.

DIY Cider Vinegar | whipandclick.com.

I was going to post this a while back, but forgot. I met a very nice gentleman from Peru who told me these cookies were his specialty. The cookies, and a broccoli-tomato soup that he strongly believes has kept his children from ever going to the hospital (lo their 20-some years). He didn’t give me the magic soup recipe, but he told me where to find the luscious dulce de leche delights: HOW TO MAKE HOMEMADE ALFAJORES | recipegirl.com.
image
Here’s a way to keep summer alive: Fancy or Sandy Fruit Salad, Anyone? | gayahousewives.
image
Stewed Fruit Recipe – Eatwell 101.
image
Chinese Scallion Pancake—Simplified Version | chinasichuanfood.com.
image
5 Healthy Soul Food Options | mademan.com.

Soul Food – American Diabetes Association.
image
Matcha Sushi Balls | Thirsty for Tea.
image
Fig Bourbon Old-Fashioned | katieatthekitchendoor.com.
image

‘Til next time!

My Way, No. 23

*If you’re new to my blog, you may want to read this for info on what ‘My Way’ posts are all about. 🙂 *

With the pic links now included, these ‘My Way’ posts are becoming as long as a newsletter. I hope you can hang with me!

— I saw this on my food co-op’s social page, so I thought I would link to it: Who Is Behind Organic Brands. This came as no surprise to me, as I try to steer clear of certain products for this very reason. But, many people assume some of these brands are small (possibly family-owned, or even local) businesses, when they are really just some of the country’s largest food producers. This is also true of natural and organic hygiene/body products, etc. Some of the brands I’ve enjoyed in the past have been taken over by some of these large producers, so I then stop purchasing them. Some brands I have no issues with, though. If you’re one of those who wants to support certain businesses (and not support others), I encourage you to take a look at this list. Or, perhaps take a look for updated info, if this news is already familiar to you. I found several I didn’t know about.

— Did you enjoy the list of coping skills for anger, anxiety and depression? I think everyone can benefit from this list. I have some decent positive ones already in place, but I would like to add a few more. Setting boundaries and learning to say “no” could be improved upon, as well as enjoying more of nature. Also, keeping a positive quote with you seems easy enough. I like, “Ye shall be a blessing.” It’s one thing for others to bless you, but (IMO) empowering others to prosper provides rewards like nothing else (emotional and physical). As far as looking at the negatives went, I tried to not get too down on myself. We can’t change everything at once. I think I have improved in several areas, but still need some work in others. I have been better at not enabling others to take advantage of me. One of the things I despise most at this stage in my life is people attempting to use me for their own selfish ambition. So, I need to make sure I am not just sitting back, allowing those circumstances to occur. Several years ago, I was encouraged by a former football player who said a friend told him (something to the effect of), “Never allow people to use or exploit you for their own profit or gain.” I think as a former ball player, people just assumed they could take advantage of him for their own purposes. Anyway, I’ve carried that bit of advice in my heart since then.

— Speaking of football players, I was really touched by this article concerning Herschel Walker’s mental health advocacy: http://www.orlandosentinel.com/health/os-herschel-walker-mental-health-orlando-20150513-story.html. If you’ve lived in Texas for even a short period of time (as I have), you most likely know who Herschel Walker is — even if you don’t follow the NFL. A very encouraging story.

After posting the latest installment of my Mental Health Series, I found a few articles that made my heart sink. Many of the most disheartening stories come from major news outlets (not all the time, though, as you can see from a variety of pieces I’ve posted). They so often focus on the negative or sensational. Some of the most sensitive and thoughtful pieces I’ve come across are from student newspapers. I thought perhaps profit has something to do with that, or maybe it’s just that the younger generations are starting to leave behind the stigma and discrimination that has plagued our society for so long. I used to laugh at a news station in the Phoenix area that always broadcasted so much positive news. It was the oddest thing to me, haha. It was a nice change.

— Today’s Adventures in Food: Hot diggity dog ziggity, boom…I didn’t have a chance to pick up hard red winter berries yet, so I made my Memorial Day hot dog buns in the same manner as the previously posted burger buns. Really a joy! The wheat blend is such a great idea. I may try sprouting them, as well. The day old buns were great dippers for a low-cal (non-gratinee) onion soup I made. The adjustable slicing blade in our new food processor works like a dream! It easily sliced through mounds of onion. My last processor, while a decent (very old) model, sometimes had slicing issues.

Holiday chocolate chip cookies had to get packaged up and shipped off so I didn’t consume the whole lot, lol. As they keep nice and soft, I think they would be grand for ice cream sandwiches. I couldn’t wait for the Holiday to make the chickpea flour spätzele. So, I made it Sunday, then again on Monday. I subbed some quickly sautéed kale for the collards (it was less expensive at the store) and cooked it in beef broth. I really like the textures in this dish. I think I will be making it a couple more times before the week is up.
image
As I was already grinding chickpeas for the spätzele, I thought I would also whip up those Cashew-Mint Pakoda I posted. I left the flour with just a slight coarseness. I went for a bake-fry by Misto-ing a little oil in the pan, as well as on the dough. I flipped them over when they were browned on the bottom. They turned out so nice and crunchy! You would not have known they were baked instead of fried. I really would have liked a dipping sauce with them. Maybe a cashew crema or something? I was too busy munching to make one, though.
image
The roasted curried cauliflower I made for my garlic, herb, & tomato pita was the tail end of a cauliflower party. I enjoyed the Buffalo Cauliflower Bites posted here and Spiced Moroccan Cauliflower Couscous – Tabbouleh (both from the same site). I am not a huge fan of couscous, so I was excited to try a version with cauliflower. I used my homemade skim haloumi, and it was fab. Really easy & delightful. Of course, using the cauliflower slashes the calories considerably, so make sure to take a peek. When I was preparing the Buffalo Bites, I suddenly thought I could also make a few with sesame-honey sauce. So, I did half and half. Otherwise, I only altered them slightly by using whole wheat pastry flour and coating with a bit of panko. I love Buffalo sauce so much, so I put a little extra on the outside, lol.
image

image
I found another comfort food use for my pitas. Did you ever have spaghetti and meatball sandwiches when you were younger? I made spaghetti and Italian lentil meatballs (just like the ones here, but with “Italian” seasonings), and the next day had a craving for this sandwich, haha:
image
We used to slather butter on good Italian bread and stuff it with our leftovers. Good memories!

— How quaint is this?

White Garden Canopy | housetohome.co.uk.
image
Ahhh…I wish I were there right now. *Sigh*

25 DIY Headboard Ideas | Freshnist.com.
image

This is a cute idea. Music sheet decoupage on wood: Paper | Valerie Carr | Pinterest.
image

— In this AZ summer heat, I adore white clothing. Linen is especially lovely. What about your plain white tee? Check out this easy corseting technique that you could apply to a number of items: DIY Corseted White T-Shirt or What to Do with the BF’s Old T-Shirts #2 | Chic Steals.
image
And, you know I love RE:Fashion: 13 DIY Clothing Refashion Ideas with Picture Instructions | Clicky Pix.
image

— The FFFF for today (Fab French Food Finds ):

You know my affinity for all things French, so here are several selections from the same site:

Provencal Style Mussels | French Cooking for Dummies.
image
Beetroot and Goat Cheese Foam | French Cooking for Dummies.
image
Artichoke, Fig and Parmesan Salad | French Cooking for Dummies.
image
Strawberry and Peach Salad with Wine Syrup | French Cooking for Dummies.
image
Parisian Shirred Egg/ Oeuf cocotte à la parisienne | French Cooking for Dummies.
image
Herbed Mascarpone Stuffed Chicken | French Cooking for Dummies.
image
Ham and Cheese Crepe/Galete Complete | French Cooking for Dummies.
image
White Chocolate Molten Cake with Raspberries | French Cooking for Dummies.
image

‘Til next time!

Making Yeast Bread Doughs w/ a Food Processor

I’m still playing around with our new processor. Over the weekend, I whipped up several things, including fresh butter and raw almond butter. I also planned to make bread, as I do most weekends. I tossed around the idea of posting pics to accompany my previous instructions for making yeast doughs with a food processor. I debated the idea for a few reasons: 1) I do not post ultra-professional pics on this blog, just mobile snapshots, 2) This is not a “food blog,” but a personal outlet journal that just so happens to contain a heck of a lot of food (you know food is one of my fave things!). So, I thought it might be slightly lame compared to some of the fab food blogs I enjoy. And, 3) Step-by-step pics/instructions are an involved process, and this blog is supposed to help me relax…not stress me out. A while back, I had a job that saw me writing numerous sets of instructions (for various tasks). “How to…” is ingrained in my brain. Hence, when it comes to instructions for this blog (my hobby), I will usually link to another’s know-how, haha. The previous yeast bread instructions were a rarity.

What made my decision for me is that I really, really hoped at least one person reading would find out how easy homemade bread is. Even if you don’t use a food processor. Baking isn’t my expertise (I’m more of a simple veggies cook), but homemade bread has its advantages: it’s inexpensive and, of course, you can better control the quality of ingredients. Aside from a using a tried-and-true recipe (until you get the hang of it), I suggest researching a little about the science of bread making (if you haven’t already). Understanding why you are doing what you are doing always helps when cooking, IMO. Recipes that were created specifically for food processors are fab, but I’ve always also had luck with stand/hand-mixer and hand-mixed recipes.

I am just going to re-post the previous instructions (yay for copy & paste!), including a few pics along the way. Don’t judge me by award-winning food blogs, OK 😉 . You may want to read the text instructions first, then go back and read it with the photo captions/explanations. I will post the general ingredients for the recipe I used at the end, but just know this is really about method (not a particular recipe). This past weekend, I had sandwiches in mind. I decided to use an old recipe my mom had for pitas. I divided the dough for a half batch of “plain” dough and a half batch of garlic, herb, and dried tomato.

Taken from My Way, No. 20:

Most of the time, I use my food processor when making bread doughs. I find it to be fairly quick and easy. You just need to make sure your processor is big enough to handle the volume of dough you are making (and that you have a strong motor). Many of the recipes I come across are for stand mixers (or hand mixing/kneading), so I usually use this simple food processor method (for non-sourdough breads) instead.
image
Olive oil, salt & pepper, vital wheat gluten, garlic cloves & home-dried tomatoes, and dried herbs (oregano, basil, thyme, & sage).
1) In a warm area (usually the top of my stove while it’s warming up) add sweetener (honey, molasses, etc.) and warm water (whatever temp range is indicated on yeast packaging) to a bowl, stir until sweetener is dissolved.
image
A thermometer is a good idea for water temp. Sometimes, I think I know what the temp is by touch, but the thermometer proves me wrong. It’s a safeguard to avoid killing your yeast.
image
Honey was called for in this pita recipe.

Stir in yeast until dissolved and let the yeast activate. Mixture should be bubbly and foaming after several minutes (sometimes, recipes will indicate an allotted activation time). *You can stir all 3 at once, I just find it’s easier for me to get the sticky honey, etc. from the bottom of the bowl when I can see it a bit better (without the yeast).*
image
Bubbly & foamy

2) While the yeast is activating, in the food processor bowl fitted with the metal ‘S’ blade (or dough blade, if you have one) add flour, vital wheat gluten or xanthan gum (if using), salt, and any other dry ingredients that are OK to be broken up into smaller pieces. (If I have ingredients I want to remain whole — perhaps raisins, nuts, candied peel, etc. — I will incorporate them after the wet ingredients have been added.) Pulse the dry ingredients for a bit (maybe a minute or less) until they are well combined.
image
I made a sprouted flour (kasha, teff, French lentils, and a few types of wheat) for this batch of pitas. Links for sprouted flour instructions can be found in this post: How to (& Why) Soak Seeds, Nuts, Grains, & Beans, & Homemade Sprouted Flour.
image
Flour, sea salt, fresh cracked black pepper, vital wheat gluten.

3) When the yeast has activated, stir in any other liquid ingredients (eggs, oil, etc.).
image
Adding the olive oil. Many of the recipes I use do not require the addition of anything else at this stage. Just yeast, sweetener, and water.

4) Add the liquid ingredients to the food processor bowl, and pulse until the dough starts to come together. Some directions might tell you to slowly add the liquid through the chute, but I’ve never had a problem just putting it all in at the beginning. I want to see a recipe one day that says, “Do this fast, as fast as you possibly can!” lol. 😀
image

image

image
*If you are at all concerned with killing your yeast (or, if it’s just your preference), you can start the processor, then pour your liquid contents in a bit at a time.*
The dough will pull away from the sides, and I usually let it go for a bit longer (just to make sure the gluten is well developed). If the dough is too sticky, I add a little flour. Too dry, a little water.
image
I had to adjust the flour & water a bit, adding a little at a time. It should yield a smooth dough with good elasticity. The bread recipes in my Cuisinart cookbook indicate a 45 second kneading time once the dough has cleaned the sides of the bowl and forms a ball.

5) If I’m adding any of those dry ingredients I mentioned in step 2, I add them at this stage. I may coat them with a little flour first, to keep them from sticking and/or bleeding. I tip the dough into a bowl, then incorporate them by hand.
image

image
Earlier, I processed the garlic, then the tomatoes in the small work bowl. I didn’t want an overly red dough, so I coated the tomatoes with flour first. I cut the dough in half and added the garlic, herbs, and tomatoes to one half.

Otherwise, I just proceed to tip the dough into an oiled bowl, form it into a ball, Misto a little oil on top, and cover the bowl. I then follow the recipe instructions concerning rest periods, rise time(s), and shaping the dough.
image

image
After covering the bowl, I let the dough rise until it doubled in a warm place (it took a little over an hour), then “punched it down,” and cut it into portions.

This is the method I’ve used for years and years, and I’ve always been pleased with the results. Online, I found you can sub xanthan gum if you run out of vital wheat gluten (useful for doughs made without white flour). From what I’ve been reading, you should use 1/2 – 1 teaspoon of xanthan gum per 1 cup of flour (vs. 1 tablespoon of vital wheat gluten).
image
I made one large GHT pita, and the rest were mediumish-sized. I rolled them out about 1/8-1/4 inch thick (after making them a few times, you kind of get the feel for how thick you like them to be), placed them on a pan to rest/rise until doubled (about 40 minutes – 1 hour, per the recipe). Then, they go into a 475 degree Fahrenheit/246 Celsius oven for 7-10 minutes. After they cool on a baking rack for a bit, I store them in an air-tight container to keep them soft.
image
Plain pita
image
Garlic, herb, dried tomato
image
Straight away, I wanted a pb&j sandwich. It’s such a comfort, isn’t it? Even my grandmother still loves them (she’s my step-gram, but I love her like my own), and we have to persuade her to also include other foods in her diet, lol. I did make peanut butter with the processor, but went for raw almond butter w/ homemade cherry jam this go round.
image
The large GHT bread was treated to homemade yogurt cheese, roasted curried cauliflower, blistered tomatoes, and arugula.

I hope this was easy enough for you to follow. Pitas are wonderful, but there are all sorts of yeast breads waiting to be made & devoured! I’m partial to wheat-based breads, but there are many alternatives (if that is not an option for you). I’ve really enjoyed these previously posted recipes:

New York-Style Bagels

5-Minute Artisan Bread

Fugazetta (Argentine Pizza)

The ingredients for this basic pita were: 3 1/2 C Whole Wheat Flour, 3 1/2 TBSP Vital Wheat Gluten, 2 1/4 tsp Active Dry Yeast (not instant/rapid), 1 tsp salt, 12 fl. oz. warm water (using temp directed on yeast packaging), 1 TBSP olive oil (not extra-virgin), 1/2 tsp. honey. *When measuring honey, I usually oil the spoon/cup, so the honey pours out easily.* I altered it by adding 1/4 tsp fresh cracked black pepper, and garlic, herb, and dried-tomatoes to half (no real measurements, just eyeballing the amounts).

Have a fabulous day, and happy bread making!

My Way, No. 22

*If you’re new to my blog, you may want to read this for info on what ‘My Way’ posts are all about. 🙂 *

— Honey gave way to maple this go round for the cherry-vanilla syrup from this previous post: 8 Fruit & Herb Honey Syrups. I still had my gift of bourbon from the December Holidays left, so I finally decided to make that float I was keen on. The syrup + club soda + bourbon + homemade vanilla froyo. Yums!
image

A beer fairy left a bit of brew for the masses, so I thought a beer bread was in order. I sprouted rye berries for a sourdough and used the beer in place of water. Beer made me think of pretzels, so that was the next step. Stuffed with brown mustard, they were a tasty treat! If I had thought about it, I might have made a homemade beer mustard:
image
I will admit I usually flake off the salt from most of them, haha. I will have one or two with the coarse salt, but then it becomes too much.

I finally made the Sesame Seed Salmon with my homemade mirin (with actual salmon this time vs. tofu). Delish! Make sure to check it out. Quick & easy.
image

Cheese, cheese, and more cheese! If you love the cheeses, please, please check out my post on Thrifty Ideas for Home Cheese Making & Homemade Cream Cheese. My mom is the one who requested I delve into the homemade cheese world, and I am so glad she did. When Mother’s Day rolls around, I try to find things I can do to please my mom (I know it should be all the time — I try 😉 ). So, many of those things have kept me from blogging this past couple of weeks. As I said in the cream cheese post, my mom adores fruit crepes (filled with a sweet cream cheese mixture). I have made several batches of cream cheese now, and it couldn’t be easier. I initially started with a buttermilk culture vs. purchasing a freeze-dried. The instructions for making your own cultures can be found in the links from the Thrifty post. I’ve now moved on to using meso & thermophilic cultures, as well as vegetarian rennet from the Cultures for Health site (also linked to in that post.). The Curd-Nerd site is SO informative, and I tried to study as much as possible before attempting too much. I recommend anyone just starting out do the same. There are quite a few things to learn, & you don’t want to waste your time or money. So far, I’ve used the recipes for queso fresco, haloumi, traditional ricotta, farmhouse cheddar (needs to age), and I just made this mozzarella:
image
Queso fresco and cream cheese (or yogurt cheese) are the easiest to make, IMO, and you can always use a buttermilk meso culture (especially if you are just starting and want to keep your costs low). I’ve made the queso and haloumi with skim milk, and they turned out fine (though not as rich). For small amounts of cheese, I started using thin, thin linen napkins (from my grandmother 🙂 ) to drain the whey from the curds. I just wash them, and they are ready to re-use. For larger batches, I started using a large piece of muslin. I will use cheesecloth to line the molds.

— I am enjoying my stainless lunch tiffin, which I must say was a SQUEAL DEAL at my food co-op, Food Conspiracy. *Sidenote: if you’re in Tucson, the co-op has unbleached cheesecloth for cheesemaking.* I hand-stitched a little insulated bag for it with material leftover from another project. I recycled the drawstring from another bag.
image
The fabric store I purchased the material at was my fave on my side of town, and I am bummed they have closed down. I keep running into others saying they are also upset. Perhaps the location was an issue. It would be nice if a locally-owned shop opened up. After doing this by hand, I thought, I really need to learn how to sew on a machine. It took far too much time, lol. Often fabric stores hold classes, so I may try to tackle my fear of it being an impossible task for me — just take the plunge.

— Other inexpensive projects I managed this week involved concrete. At less than $3 for a 60 lbs. bag, I feel I made out quite well. First off, I partially filled these small tin buckets:
image
What did I do with them, you ask? OK, don’t think I’m silly (OK, maybe I am), but I made a set of bed risers. A while back, I saw a set of 4 bed risers (upwards of $20) that were essentially a cup with a lift in them. I thought cement/concrete in my own cups would produce the same effect. I just wanted a few extra inches for under bed storage. You just mix the concrete with water, let dry, and voila! I used more leftover fabric around the frame legs so they wouldn’t shift around. This proved fabulous and provided me with the storage space I desired…with very little cost.

And, until I decide to invest in a full-on cheese press, I filled recycled containers with the concrete to weigh down my cheese molds. So far, so good, and I am sure I can come up with a few other ways to make use of the rest of the bag.

— We did decide to invest in the Cuisinart Elite 12-Cup Processor. 10-year motor warranty, with a limited 3-year warranty, 1000-Watt motor. So sorry, Cuisinart was misspelled in the last post. Sometimes, if a word is incorrect once, it will not change it afterwards (I guess it thinks it’s correct). As I previously stated, it has large and small work bowls, so you get 2 for 1. I’ve whipped up pizza dough for my mom, smooth as silk nut butter, falafel, guacamole, banana “ice cream” (using the recipe from the included cookbook with a bit of honey, vanilla, and fresh coconut milk), and shredded coconut (for chocolate-coconut bon bons for my mom). With my previous processor, I used the metal ‘S’ blade for bread doughs, but this model has a specific yeast dough blade. The metal blade works well for pastry doughs. It also includes an adjustable slicing disk.
image
Right now, I couldn’t be more pleased! Slow cookers and processors are 2 of my most beloved pieces of kitchen equipment. I also found you can purchase an egg white whipping disc separately. If you are in the market for a new processor, I encourage you to watch the demo video on the Cuisinart site. It would also make a great gift!

— One more thing that might sound silly…Last year, I pulled out some vinyl that didn’t work for a project I had in mind. I happened to be cleaning the fridge around the same time and suddenly thought it would be great to line the fridge shelves/drawers. The backing is kind of a thin, breathable fabric. Well, a year later, this one little thing has saved me tons of clean-up time. It may seem odd at first, but spills, etc. wipe off so easily. Or, you can pull them out and wash them.

— Would love to DIY leather (probably with pleather, though) bracelets such as these:

Newset Fashion DIY Jewelry Copper Leather Bracelet | ebay.es.
image
Hot Fashion Infinity Leather Music Bracelet | ebay.com.
image

Racer back DIY just in time for summer:
Tank to Racer Back Tutorial | trashtocouture.com.
image

— The heat has come, so I started to search for DIY patio blinds/shades. I’ve finally made up my mind about which route to take, but I wanted to share this budget-fab project I came across: No Sew Drop Cloth Patio Curtains | scatteredthoughtsofacraftymom.com.
image

Blue is not my fave color, but I found this room so soothing and peaceful to look at:
eudecoro.com.br.
image

Amazing World of Penguins. Awesome pics, must see!

— Good goodies:

Spinach and White Bean Tacos | theskinnyfork.com.
image

Found another way to use teff: 5-Ingredients Banana Pancakes with Teff Grains (Gluten Free) | fussfreecooking.com.
image

Hip Girl’s Buttermilk Cake | ohsweetday.com.
image

Buffalo Cauliflower Bites | lavenderandlovage.com.
image

Spinach-Stuffed Baked Salmon | Go Red for Women.
image

Baked Alaska | Great British Chefs. It has a panettone base!
image

For your retro party: Pineapple Cheese Ball with Pecans | sippitysup.com.
image

Detox Smoothie | blog.freepeople.com.
image

Rainbow Sangria | Gimme Some Oven.
image

Until next time! Have a great day!

My Way, No. 20

*If you’re new to my blog, you may want to read this for info on what ‘My Way’ posts are all about. 🙂 *

— I had a fab indulgence last week with the Fugazetta (Argentine Pizza) recipe. So tasty! The recipe calls for gobs and gobs of cheese, though, which I cannot have. I probably used less than a fourth of what it called for, but it was still quite delightful. I compromised with myself by tossing on a part-skim mozz vs. provolone. If I have dairy with any fat, I just have to limit my portions. Instead of a sheet pan, I made the Fugazetta in a 11.5 inch cast iron pan. My crust was probably a little thicker, but I absolutely loved it. It was pillowy-soft throughout and crispy on the bottom. I pushed the dough around the edges to make an even thicker crust around the rim. It reminded me of a thick-crust pizza from a restaurant in Texas. Even if it’s not my traditional NY-style, this familiarity brought me comfort. I just wished I had one of those neat-o Scizzas to cut it with! I had to make do with my boring pizza wheel. The instructions said to put the pan on the bottom rack to bake, but I was scared it would brown too quickly. My oven temp varies in different parts, so I thought it best to put it on the top rack. I let it go for 10 minutes, then gave it a hit under the broiler. I made a honey-whole wheat dough adapted from the original recipe. Toppings are just cheese (provolone or mozz), caramelized onions, green olives, oregano, and red pepper flakes, so it’s easy peasy. I added a bit of smoked salt (as I did when I made the sriracha-garlic knots) to give it a “brick-oven” appeal. I’m almost mad I found this recipe! You forget how much you love pizza until you have pizza again.
image

Most of the time, I use my food processor when making bread doughs. I find it to be fairly quick and easy. You just need to make sure your processor is big enough to handle the volume of dough you are making (and that you have a strong motor). Many of the recipes I come across are for stand mixers (or hand mixing/kneading), so I usually use this simple food processor method (for non-sourdough breads) instead:
1) In a warm area (usually the top of my stove while it’s warming up) add sweetener (honey, molasses, etc.) and warm water (whatever temp range is indicated on yeast packaging) to a bowl, stir until sweetener is dissolved; stir in yeast until dissolved and let the yeast activate. Mixture should be bubbly and foaming after several minutes (sometimes, recipes will indicate an allotted activation time). *You can stir all 3 at once, I just find it’s easier for me to get the sticky honey, etc. from the bottom of the bowl when I can see it a bit better (without the yeast).*
2) While the yeast is activating, in the food processor bowl fitted with the metal blade, add flour, vital wheat gluten or xanthan gum (if using), salt, and any other dry ingredients that are OK to be broken up into smaller pieces. (If I have ingredients I want to remain whole — perhaps raisins, nuts, candied peel, etc. — I will incorporate them after the wet ingredients have been added.) Pulse the dry ingredients for a bit (maybe a minute or less) until they are well combined.
3) When the yeast has activated, stir in any other liquid ingredients (eggs, oil, etc.).
4) Add the liquid ingredients to the food processor bowl, and pulse until the dough starts to come together. Some directions might tell you to slowly add the liquid through the chute, but I’ve never had a problem just putting it all in at the beginning. I want to see a recipe one day that says, “Do this fast, as fast as you possibly can!” lol. 😀 The dough will pull away from the sides, and I usually let it go for a bit longer (just to make sure the gluten is well developed). If the dough is too sticky, I add a little flour. Too dry, a little water.
5) If I’m adding any of those dry ingredients I mentioned in step 2, I add them at this stage. I may coat them with a little flour first, to keep them from sticking and/or bleeding. I tip the dough into a bowl, then incorporate them by hand. Otherwise, I just proceed to tip the dough into an oiled bowl, form it into a ball, Misto a little oil on top, and cover the bowl. I then follow the recipe instructions concerning rest periods, rise time(s), and shaping the dough.

This is the method I’ve used for years and years, and I’ve always been pleased with the results. Online, I found you can sub xanthan gum if you run out of vital wheat gluten (useful for doughs made without white flour). From what I’ve been reading, you should use 1/2 – 1 teaspoon of xanthan gum per 1 cup of flour (vs. 1 tablespoon of vital wheat gluten).

— Speaking of food processors, I am on the lookout for a new one soon. I have investigated several models, but haven’t completely made up my mind yet. I like this Cuisanart Elite 12-Cup model with a 1000-Watt Peak Motor | Cuisanart.com.
image
I’ve had good experiences with Cuisanart products in the past, so they were one of the first brands I scoped. A good processor (with a powerful motor) is an investment, for sure, but it’s a piece of equipment I use multiple times during the week. A quality processor will last for years and years. This one has a smaller work bowl, as well, so you get 2 for 1.

— The 2-Minute Green Spaghetti Sauce from the last ‘My Way’ post saved me quite a bit of time last week. I made batches of my standard ‘red’ the previous few weekends, so a change was in order. Totally simple, but I added a few things like garlic, chives, & hot pepper sauce. You just whizz it right up in the blender. I chose the option of nutritional yeast vs. parm & replaced the milk with the hot pasta water (my milk was frozen!). A couple of times, I added a bit of tinned salmon and finished with ground almonds — a quick and fab meal! I made another batch this past weekend. Make sure to check out the recipe if you get a minute.

— I am making another folding side table, this time a much easier version. I just spray painted the base of an old, beat up table, then staple gunned a DIY waterproof fabric to the top. I found a tip on another site: if your wax is a little white and streaky (from cooling) when applying the oil & wax mixture, use a blowdryer on the fabric for a bit. I tried this, and it worked beautifully. I have updated my How to Waterproof Fabric post with this tip.

— OK, so those are just temp pieces of furniture, not meant to stay up for any length of time — just a quick fold out, then up. But, I am trying to rethink a space to permanently store a few items. I really like this practical wooden boxes approach: DIY: VERSATILE USE OF WOODEN BOXES | Scandinavian Deko.
image

I have no idea what this says (as it’s in Spanish), but this looks like a fun place to be: Glamourosos y Coloridos Dormitorios de Niñas | Decoracion.IN.
image

— Love this article on How to Get Healthy Skin: A Natural Approach to Healthy Skin | DIYNatural.com.
image
“I’ve been asked over and over how old I am. I chuckle quietly to myself while someone tries to guess – often well below my actual age. I have good skin, and although I hit 51 last December, my skin is one of my best features. How do I do it? By using quite a few herbs and supplements that promote healthy, younger looking skin,” she says. Along with other types of oil, I like to use dabs of olive oil on my face (in certain spots) — fab for moisturizing the hair, as well. Also, if you haven’t done so already, check out my previous post: 10 Homemade Facial Scrubs.

— Cute iron-on appliques if you are not a machine sewer:
Hotfix Paris Eiffel Tower Applique Design for Fashion and Home Decor | Etsy.com | KBazaar.
image

— The Local First Arizona website gives a few tips on ‘keeping it local’ for upcoming graduations (they’ll be here before you know it!). If you’re in Tucson, we have SO many fine restaurants to celebrate at. Check out some of the pics under the Restaurants category of my blog menu.

— Today’s Nommy Treats:

One-Pan Jalapeño Kale & Roasted Garlic Egg Scramble | naturalchow.com.
image
Cold Sesame Coconut Noodle Salad | internationalrecipes.net.
image
Chocolate Garam Masala Truffles

Sea Bass in Coconut Cream

Pumpkinseed Butter Goji Cookies | Golubkakitchen.com.
image
Cherry Whiskey Smash | threadsence.com.
image
The Perfect Chinese Chicken Salad | toastytalk.com.
image

Well, I posted the whimsical Fish-Shaped Puff Pastry Entree, but have you ever made puff pastry from scratch? It’s easier than you think, more economical, and you can control the quality of the ingredients. If you can roll out pie crusts, tortillas, etc., then you can make puff pastry! It can take a bit of time, but it is well worth it. If you have little patience for the longer traditional French technique (the horror! lol), check out this quicker version: Homemade Puff Pastry ~ a quicker version | aflockinthecity.com.
image
Or, this: Quick Whole Wheat Puff Pastry | pinchandswirl.com.
image

Have a wonderful day, & I’ll see you next time!

Basic Kitchen Equipment List & Equipment Substitutions

Kitchen Equipment List | Elle A Cooking.

I thought I would share this link about basic equipment for your kitchen. I absolutely love any type of kitchen gadget, and it’s probably one of the only things I don’t mind spending a bit of money on. But, my blog is called ‘La Cashionista,’ so I thought I would throw out a few inexpensive substitution ideas. I thought some of you may be just starting to stock your kitchens (or know someone who is), or you may just want some ideas for simple swaps.

Before I get to that, though, I want to gush about a few kitchen items that I love, love, love (just basic stuff, not the fancy gadget-type things). The first thing anyone who knows me will tell you is that I absolutely adore my Forschner Victorinox bread knife. I gave away a couple thousand dollars worth of knives in lieu of this one. Not kidding. I use it for nearly everything (even if it’s not “proper”), except perhaps paring and boning. I have already written about my fondness for cast iron pots and pans. Besides being easy to clean, they can double as a serving dish. A few other faves that come to mind: my rubber spatula with curved up edges (spoon/spatula), food processor, blender, mandolin with julienne blades, slow cooker, veggie peeler, zester, graters, chinois, and misto sprayer. These are some of the items I wouldn’t want to be without.

As for equipment substitutions, here are a few I’ve thought of:

1) I mentioned in an earlier post about subbing a soup can for a cookie cutter.

2) I often use the food processor for doughs instead of a stand mixer, as it can be quicker. They are easy to use and will also slice, chop, mince, grate, shred, and julienne with the attachments. If you are lacking space, though, a mandolin and a small and large grater can be useful (and a cheaper purchase). Also, look for ‘no-knead’ recipes if you prefer not to knead dough by hand (and a mixer or processor is not an option).

3) Don’t have a fancy tortilla press? Just use a heavy object like a book to smash your little balls of dough. Or, if you’re crafty, make one yourself: DIY Tortilla Press. If you enjoy woodworking, you might also try making your own cutting board. Really crafty, try making your own wooden spoons.

4) OK, I know you already know this, but…just use the pot lid to strain out your pasta water instead of a colander. And, if you’re already in a lazy mood, just use the biggest frying pan you have to boil your spaghetti water (vs. that mammoth stock pot). I know it’s not proper, haha, but the water will boil faster. Plus, who cares about proper when we need to get to eating!

5) If you don’t have an actual pasta machine, use a pizza wheel to cut your homemade dough for pastas like fettuccine (I saw this somewhere, but don’t have the link). Good for homemade tortilla chips, too.

6) A good blender is a great investment. But, if you’re only going to make protein shakes for the gym, try buying a bottle with a ‘blender ball’ inside to save a little cash.

7) Use a thin linen tea towel if you run out of cheesecloth. Also, a chinois is nice, but it takes up a lot of space. Sub a smaller strainer with cheesecloth if you need to create a silky smooth sauce.

8) Use any thicker sheet of flexible plastic that you may have (like a placemat) in place of a sushi roll mat.

9) Lastly, these are not really sub ideas, but I thought I would include them: if you are just starting to stock your kitchen (but you want to get a little more creative with your cooking) try purchasing small, inexpensive gadgets such as veggie peelers, melon ballers, small ice cream scoops, and zesters. These types of items will allow you to garnish and create interesting shapes for your dishes without a lot of expense. You will obviously need to make a few larger purchases when first setting up a kitchen, so you might try items that have several uses. For example, I love slow cookers for a good stew, etc., but you can also make things like homemade yogurt or essential oils in them. Food processors also do a host of tasks.

I am sure there are a lot of other substitutions you can make, but that’s my list for now. I will post more as I have time. The blog link I shared also offers cooking classes, so take a look to see if you might be interested (if you’re in the area).